警告(2022.7.8):本文撰写于2021年7月16日,目前推荐和WebAssembly一起上手的是Go语言,Go对Wasm的支持和生态较Rust来说更加完善,所以你可以不用往下看关于Rust语言和WebAssembly一起使用的内容了。
1.缘起
我常用企鹅物流数据统计(哎呀都是老刀客塔了),然后企鹅物流数据统计新出了一个功能是OCR上传数据,然后上面标识着”您所有提供的图片均仅会通过使用 WebAssembly 技术于您的浏览器本地进行识别、不会向服务器上传,因此不产生额外流量开销。“然后又不知道WebAssembly是何方神圣,于是去某站查了一下,发现比较那个什么.......

2.介绍
WebAssembly是用各种语言写(包括Rust)的然后预编译的一个二进制文件,文件的后缀是.wasm。在2019年10月加入HTML,CSS,JS三兄弟行列中。目前基本主流浏览器均可支持WebAssembly。WebAssembly的话效率比JavaScript要更高一些。即便这样,WebAssembly也不会替代JavaScript。因为它们是互存关系。但是WebAssembly也有一些缺点,例如:预编译文件太大导致加载不出来,企鹅物流数据统计的这个wasm文件竟有2.1MB之大,对于网络波动很大的是很大的疼点。但是目前3G的速度都可以达到500KB/s,加载JS差不多500ms,但是WASM就要4s了。其次,WebAssembly不兼容IE(当然它兼容IE干嘛,IE都快死了)

3.入门土
好了废话不多说,我们开始入门土。
3.1 准备环境
首先我们要准备好Rust运行环境。先去https://www.rust-lang.org/zh-CN/tools/install把rusetup-init.exe(Windows)(MAC OS和Linux应该是rusetup.sh)下载下来然后运行......
下面只介绍Windows的安装方法(WDNMD手上没有Mac Book)
运行rusetup.exe就行了,然后都根据Default(上面打了括号的)来
如果它让你安装GNU Cpp依赖,那打y就行了~
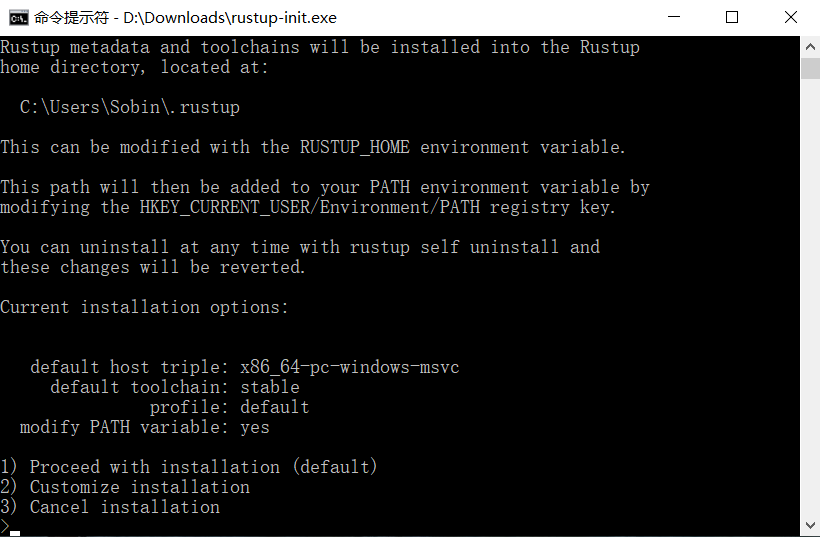
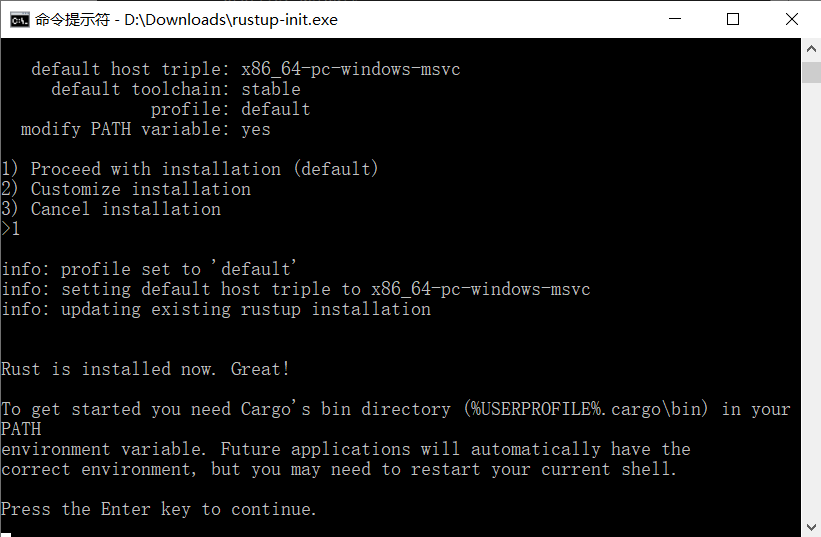
然后打开你的无格式文本编辑器,我们以VSCode为例来开发我们的第一个WebAssembly程序。
首先我们先检查一下Rust是否安装成功,可以在你的Terminal里面输入以下命令,如果是图片上的那样,那恭喜你,安装成功!
rustc --version
cargo --version

如果它显示“'rustc' 不是内部或外部命令,也不是可运行的程序或批处理文件。”或“'cargo' 不是内部或外部命令,也不是可运行的程序或批处理文件。”的话,那你要看看是不是有什么问题了~
然后我们再安装好VSCode里面调试Rust文件的依赖(当然你习惯用GDB了也可以跳过这一步)
要安装的两个扩展是Rust和Native Debug,点击最下面那个进入扩展商店然后搜索安装扩展就可以了~

3.2 写个Hello World试试看?
Rust的包管理器Cargo已经给我们提供了一个Hello World模板,我们可以用上。在你的Terminal中输入
cargo new greeting
cd ./greeting
cargo build
cargo run
如果输出Hello World,那么说明你成功了!
如果碰到这种问题的话:
F:\greeting>cargo run --verbose
 Compiling greeting v0.1.0 (F:\greeting)
 Running `rustc --crate-name greeting --edition=2018 src\main.rs --error-format=json --json=diagnostic-rendered-ansi --crate-type bin --emit=dep-info,link -C embed-bitcode=no -C debuginfo=2 -C metadata=62453b21762aa214 --out-dir F:\greeting\target\debug\deps -C incremental=F:\greeting\target\debug\incremental -L dependency=F:\greeting\target\debug\deps`
error: linker `link.exe` not found
 |
 = note: 系统找不到指定的文件。 (os error 2)

note: the msvc targets depend on the msvc linker but `link.exe` was not found

note: please ensure that VS 2013, VS 2015, VS 2017 or VS 2019 was installed with the Visual C++ option
error: aborting due to previous error

error: could not compile `greeting`

Caused by:
 process didn't exit successfully: `rustc --crate-name greeting --edition=2018 src\main.rs --error-format=json --json=diagnostic-rendered-ansi --crate-type bin --emit=dep-info,link -C embed-bitcode=no -C debuginfo=2 -C metadata=62453b21762aa214 --out-dir F:\greeting\target\debug\deps -C incremental=F:\greeting\target\debug\incremental -L dependency=F:\greeting\target\debug\deps` (exit code: 1)
我们只需要安装Visual C++ Build Tools 2015(当然你也可以用2019)即可,微软官方(Visual C++ Build Tools 2015)下载地址:https://download.microsoft.com/download/5/f/7/5f7acaeb-8363-451f-942568a90f98b238/visualcppbuildtools_full.exe(当然你可以先试试2015然后再试试2019,我这边2015是废了的)
2019下载地址:https://visualstudio.microsoft.com/thank-you-downloading-visual-studio/?sku=BuildTools&rel=16
Visual C++ Build Tools 2015
可能配置源要一段时间(微软服务器这尿性,都BA了还不用国内节点)

预先警告:Visual Studio Visual C++ Build Tools可能会吃你硬盘,占用4GB(微软可真是能人)
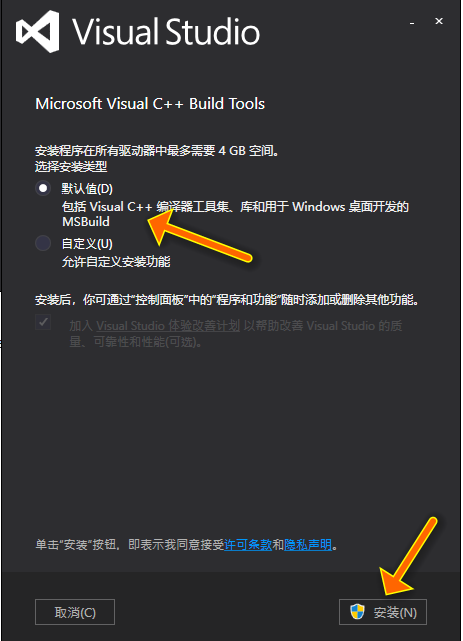
它中间可能会出现什么安装包丢失或损坏,选择从”Internet下载包“即可(我都不知道微软怎么想的,服务器这尿性,重试也没用)
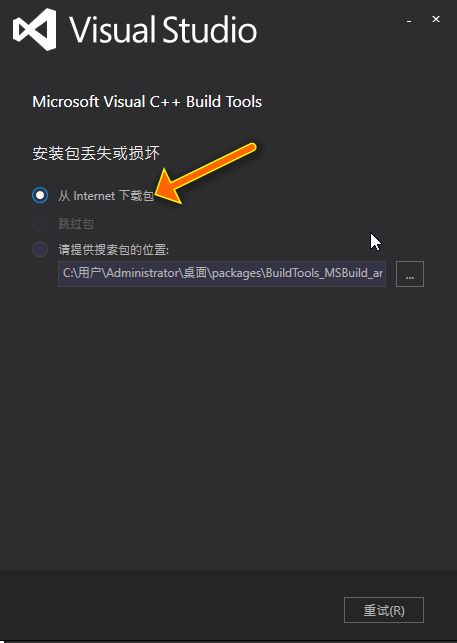
Visual Studio Visual C++ Build Tools 2019
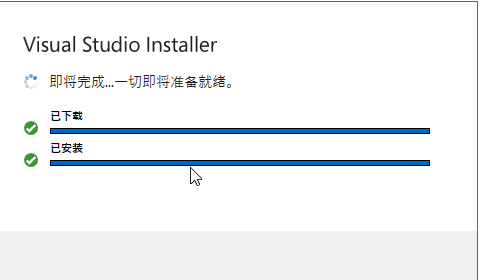
先把安装包下载好然后再运行~
点继续

然后等微软卡的要死的服务器下载好......
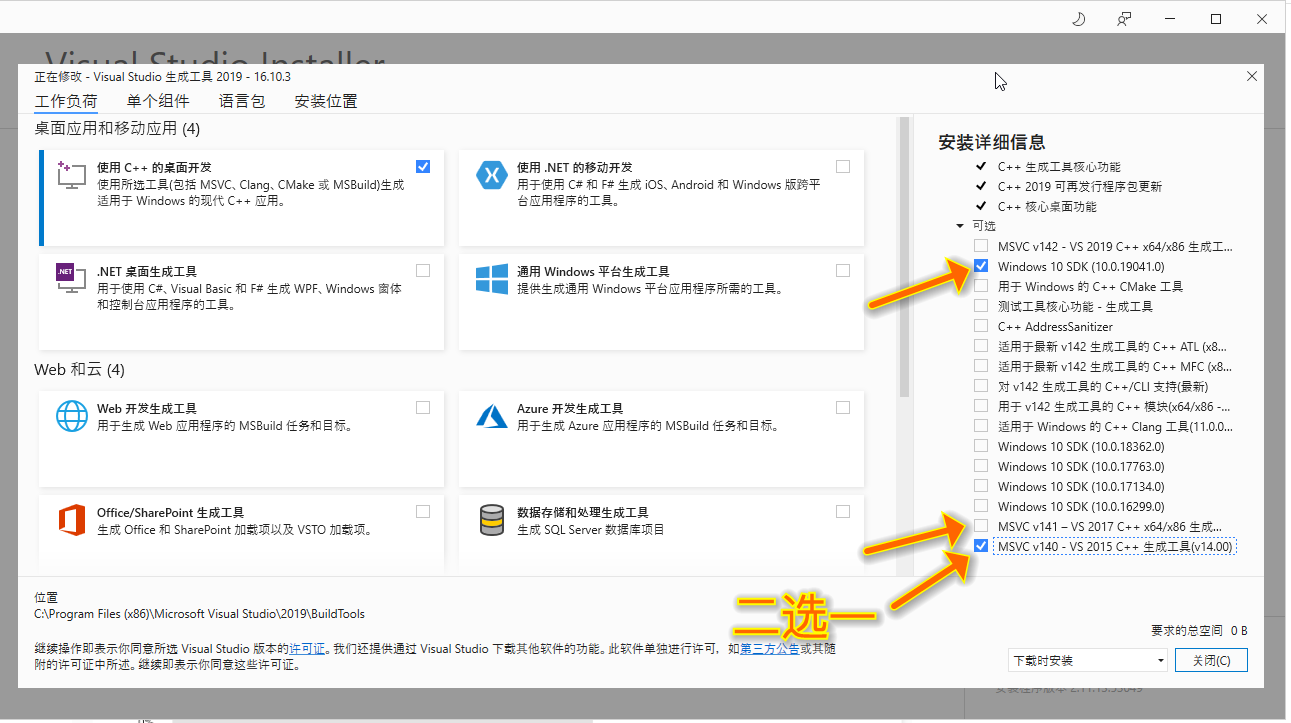
然后把“使用C++的桌面开发”,(MSVC v140 VS2015生成工具和 MSVC v141 VS2017二选一) ,适用于最新的v142工具的C++模块和Windows 10 SDK勾选就好了,注意:其它的不需要勾选!!!,然后里面的那四个已经勾选的也可以删掉。然后点击下面的安装。(微软这这么大?至少8GB起步)
去喝杯咖啡吧.......微软服务器这尿性没那么快就下好的

它竟然还要重启主机(微软我*****)
如果这个办法实在不行,你可以安装Visual Studio Community版本(当然这货内存更大了,记住必须用2017版本)
然后就成功啦
F:\greeting>cargo build
 Compiling greeting v0.1.0 (F:\greeting)
 Finished dev [unoptimized + debuginfo] target(s) in 0.67s

F:\greeting>cargo run
 Finished dev [unoptimized + debuginfo] target(s) in 0.00s
 Running `target\debug\greeting.exe`
Hello, world!
3.3 把你写的Rust程序转换为Wasm文件!
接下来你需要在https://rustwasm.github.io/wasm-pack/installer/安装wasm-pack(Windows下载wasm-pack-init.exe)
Linux与Mac OS一起在终端执行以下命令
curl https://rustwasm.github.io/wasm-pack/installer/init.sh -sSf | sh
然后执行命令或运行文件

然后再把你的Hello World项目打开,找到Cargo.toml然后把这个文件全部清空先使用这个配置
[package]
name = "greeting"
version = "0.1.0"
edition = "2018"

# See more keys and their definitions at https://doc.rust-lang.org/cargo/reference/manifest.html
# Lib依赖
[lib]
crate-type = ["cdylib"]
path = "src/main.rs"

# WASM依赖
[dependencies]
wasm-bindgen = "0.2.48"
然后再把你的src文件夹的main.rs直接清空然后复制下文
use wasm_bindgen::prelude::*;

#[wasm_bindgen]
pub fn add(a: i32, b: i32) -> i32{
 return a + b;
}

pub fn main(){

}
add是一个相加函数,因为Hello World函数出现了神奇的问题,我们这里就先不用了~
然后我们要先配置一下你的Cargo镜像服务器(一般来说如果用的是国外的会炸)
在你的用户根目录中,有一个.cargo文件夹,进入文件夹,创建config文件,填写以下内容:
[source.crates-io]
registry = "https://github.com/rust-lang/crates.io-index"
replace-with = 'ustc'
[source.ustc]
registry = "git://mirrors.ustc.edu.cn/crates.io-index"
然后运行以下命令
cargo build
wasm-pack build --target web --no-typescript --mode normal
然后慢慢等待它了......
然后它上面出现了以下提示,只要把路径拷到PATH变量里面,然后再次运行wasm-pack build --target web --no-typescript --mode normal即可
warning: be sure to add `C:\Users\uuu233\AppData\Local\.wasm-pack\.wasm-bindgen-cargo-install-0.2.74\bin` to your PATH to be able to run the installed binaries
如果一切成功,那么就是差不多长这样的:
F:\greeting>wasm-pack build --target web --no-typescript --mode normal
[INFO]: Checking for the Wasm target...
[INFO]: Compiling to Wasm...
warning: file found to be present in multiple build targets: F:\greeting\src\main.rs
warning: function is never used: `main`
 --> src/main.rs:1:4
 |
1 | fn main() {
 | ^^^^
 |
 = note: `#[warn(dead_code)]` on by default

warning: 1 warning emitted

 Finished release [optimized] target(s) in 0.05s
[WARN]: :-) origin crate has no README
[INFO]: Installing wasm-bindgen...
[INFO]: Optimizing wasm binaries with `wasm-opt`...
[INFO]: Optional fields missing from Cargo.toml: 'description', 'repository', and 'license'. These are not necessary, but recommended
[INFO]: :-) Done in 1.28s
[INFO]: :-) Your wasm pkg is ready to publish at F:\greeting\pkg.
然后你就会惊奇的发现在你的项目文件夹里面出现了一个新的pkg文件夹
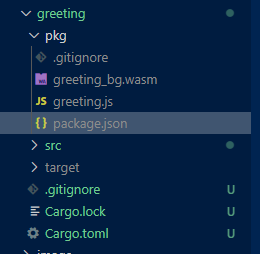
里面有我们在上面看到的wasm,成功了!
但是,我们还需要把它引入HTML文件中。我们该怎么引入呢(HTML文件和.wasm都要扔到网络服务器上,例如:nginx)
我们编写一个HTML文件,如下:
<!DOCTYPE HTML>
<html>
<head>
<meta charset="utf8">
<title>Hello WebAssembly!</title>
</head>
<body>
<script type="module">
 main()

 async function main() {
 const wasm = await import('./pkg/greeting.js')//你的pkg包里面的.js文件
 await wasm.default('./pkg/greeting_bg.wasm')//你的pkg包里面的.wasm文件
 console.log("1+1="+wasm.add(1,1))
 }
</script>
</body>
</html>
然后进入F12(懂我在干嘛)然后我们可以惊讶的发现你的.wasm文件已经引入了,1+1也成功输出了!大功告成!
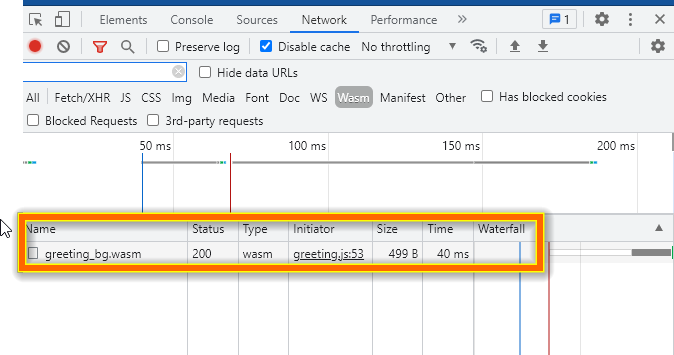

至此,我们的入门土已经结束了~
3.4 出现的问题
目前我遇到的问题就是cargo build出现某些莫名奇妙的错误,但是你再试几次理论上来说成功了,善用搜索引擎~
4 总结
Rust和WebAssembly的开发可真是劝退......环境就很难构建,我头都快大了。但是效率还是很高的。

Preview: